How to Make Authentic Paneer Butter Masala
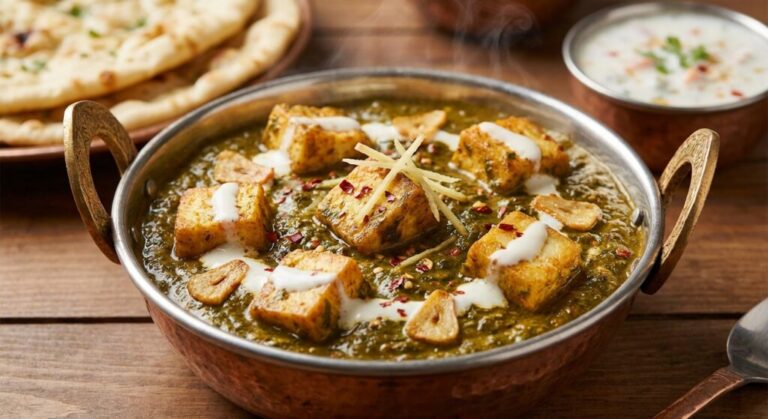
Paneer Butter Masala is one of the most popular and beloved dishes in Indian cuisine. This rich, creamy, and indulgent curry features soft cubes of paneer (Indian cottage cheese) swimming in a luscious tomato-cream gravy that is finished with generous amounts of butter and cream. It is a staple on restaurant menus across India and around the world, and for good reason — the combination of tangy tomatoes, aromatic spices, and velvety cream creates a flavor profile that is both comforting and luxurious.
Making restaurant-style paneer butter masala at home is entirely possible, and once you master the technique, you will never need to order it from a restaurant again. In this detailed guide, we will walk you through every step, from preparing the perfect tomato-cream gravy to properly handling the paneer, to achieving that restaurant-quality butter and cream finish.
The Tomato-Cream Gravy: The Heart of the Dish
The gravy is the soul of paneer butter masala. Getting the right balance of tomatoes, cream, and spices is what separates a mediocre version from an extraordinary one. Here is how to build the perfect gravy from scratch:
- Choose the right tomatoes. Use ripe, red, juicy tomatoes for the best flavor and color. Roma or plum tomatoes work particularly well because they have a higher flesh-to-seed ratio and less water. Avoid green or underripe tomatoes, which will make the gravy bitter and acidic.
- Blanch and puree the tomatoes. For the smoothest gravy, blanch the tomatoes in boiling water for 60 seconds, then transfer them to ice water. This loosens the skin, which can be peeled off easily. Blend the peeled tomatoes into a smooth puree. This extra step creates a silky gravy without any skin or seed fragments.
- Cook the tomatoes until the oil separates. This is the most important step in developing the gravy flavor. After adding the tomato puree to the pot with the spices, cook it on medium heat for 15 to 20 minutes, stirring occasionally, until the raw smell disappears, the color deepens to a rich red, and oil starts to float on the surface. This indicates that the tomatoes are fully cooked and the flavors have concentrated.
- Add cashew paste for creaminess. A paste made from 10 to 12 soaked cashews blended with a small amount of water adds incredible creaminess and body to the gravy. Add this after the tomatoes are cooked and stir well. The cashew paste thickens the gravy and adds a subtle sweetness that balances the acidity of the tomatoes.
- Use Kashmiri red chili powder for color. Kashmiri chili powder provides a vibrant red color without excessive heat. This is what gives restaurant paneer butter masala its beautiful appearance. Use about one to two teaspoons depending on your heat preference.
- Balance the sweetness and acidity. A small amount of sugar (about half a teaspoon) helps balance the acidity of the tomatoes and creates a more rounded flavor. Taste the gravy and adjust the sugar and salt as needed.
The tomato-come-gravy requires patience. Rushing the tomato cooking step will result in a raw, acidic taste that no amount of cream can mask. Cook the tomatoes thoroughly until they are deep red and the oil has separated.
Paneer Preparation: Getting the Texture Right
Paneer is a delicate ingredient that requires careful handling. How you prepare and cook the paneer cubes directly affects the final texture and quality of the dish.
- Use fresh, high-quality paneer. Fresh paneer has a soft, creamy texture that absorbs the flavors of the gravy beautifully. If possible, make your own paneer at home using full-fat milk — the difference in quality is remarkable. Store-bought paneer can be quite hard and rubbery, so look for the freshest option available.
- Soak store-bought paneer in warm water. If you are using store-bought paneer, soak the cubes in warm salted water for 20 to 30 minutes before cooking. This rehydrates the paneer and makes it significantly softer. This simple step can transform even the hardest paneer into something tender and pleasant to eat.
- Do not over-cook the paneer. Whether you pan-fry, bake, or add the paneer directly to the gravy, avoid over-cooking. Paneer does not need much time — it just needs to be heated through and absorb some flavor. Over-cooked paneer becomes rubbery and tough.
- Light pan-frying for extra flavor. For a richer flavor, lightly pan-fry the paneer cubes in a tablespoon of butter or ghee until they develop a golden crust on all sides. This adds a subtle nutty flavor and a pleasant texture contrast. However, this step is optional — many authentic recipes add raw paneer directly to the gravy.
- Add paneer at the right time. The paneer should be added to the gravy during the last 5 to 7 minutes of cooking. This gives it enough time to absorb the flavors without becoming overcooked. If you add the paneer too early, it will become tough and chewy.
- Gentle simmering, not boiling. Once the paneer is in the gravy, keep the heat low and let it simmer gently. Boiling will cause the paneer to break apart and become grainy.
Butter and Cream Finishing: The Indulgent Touch
The final addition of butter and cream is what gives paneer butter masala its signature richness and velvety texture. This is not the time to be shy with these ingredients — they are essential to the dish.
- Use good quality butter. Unsalted butter is preferred because it allows you to control the salt level independently. If you can find white butter (makhan), which is freshly churned and has a milder, creamier flavor, that is even better. Add a generous tablespoon of butter to the gravy after the paneer is added.
- Add fresh cream at the end. Heavy cream or fresh cream (malai) is added in the final two to three minutes of cooking. Pour it in gradually while stirring continuously to ensure even incorporation. The cream creates the signature silky, luscious texture that defines the dish.
- Do not boil after adding cream. Once the cream is added, keep the heat on the lowest setting and do not let the gravy boil. Boiling causes the cream to separate and creates a grainy texture.
- A final knob of butter before serving. For the most indulgent presentation, add a small knob of cold butter on top of each serving just before it goes to the table. As it melts into the hot gravy, it creates a beautiful glossy finish.
- The right consistency. The finished gravy should be thick enough to coat the back of a spoon but still pourable. If it is too thick, add a splash of warm milk. If it is too thin, simmer for a few more minutes to reduce it.
Spice Balance: Achieving the Perfect Flavor Profile
The spice profile of paneer butter masala is relatively mild compared to many Indian curries, but the balance is critical. Each spice plays a specific role, and the harmony between them is what makes the dish so satisfying.
- Butter and ghee as the cooking base. Start by heating a generous amount of butter and ghee in the pan. This rich, fatty base carries the flavors of the whole spices and creates the foundation of the gravy.
- Whole spices for aroma. Green cardamom, cinnamon, cloves, and bay leaves are the essential whole spices. They are added to the hot butter and allowed to sizzle for 30 to 60 seconds to release their aromatic oils.
- Ginger-garlic paste for depth. Fresh ginger-garlic paste is cooked in the butter until the raw smell disappears, about 2 minutes. This adds warmth and depth to the gravy base.
- Kashmiri chili for color, not heat. As mentioned, Kashmiri red chili powder provides the vibrant red color without excessive spiciness. This keeps the dish mild and accessible to all palates.
- Garam masala for warmth. A small amount of garam masala added towards the end of cooking provides a warm, aromatic finish that complements the cream and butter beautifully.
- Kasuri methi for authentic flavor. Crushed dried fenugreek leaves (kasuri methi) stirred in during the last few minutes of cooking add a distinctive, slightly bitter-sweet flavor that is characteristic of authentic paneer butter masala. Use about one teaspoon, crushed between your palms before adding.
Restaurant-Style Tips and Tricks
Here are some additional tips that professional cooks use to achieve restaurant-quality results:
- Strain the gravy for extra smoothness. For the silkiest possible gravy, pass the cooked tomato base through a fine-mesh strainer before adding the cream. This removes any remaining bits of tomato skin, seeds, or spice fibers.
- Use a blender for the final gravy. After cooking the tomato base and cashew paste together, blend the entire mixture until completely smooth before returning it to the pot. This creates the ultra-smooth, restaurant-style consistency that is hard to achieve with just stirring.
- Finish with a squeeze of lemon. A tiny squeeze of fresh lemon juice at the very end brightens all the flavors and cuts through the richness of the cream and butter. Use sparingly — about half a teaspoon is enough.
- Garnish thoughtfully. A swirl of cream, a few fresh cilantro leaves, and a small knob of butter on top make for a beautiful presentation that matches what you would see in a restaurant.
- Let it rest before serving. Like most curries, paneer butter masala tastes better after resting for 10 to 15 minutes. The flavors have time to meld and the gravy thickens slightly as it cools.
Frequently Asked Questions
Can I use tofu instead of paneer for a vegan version?
Yes, firm tofu can be used as a substitute for paneer, though the texture and flavor will be different. Tofu has a more neutral, slightly beany flavor compared to the creamy, milky taste of paneer. For the best results, press the tofu to remove excess water, freeze and thaw it (this changes the texture to be more porous and better at absorbing flavors), and then pan-fry until golden before adding to the gravy. You will also need to replace the butter and cream with plant-based alternatives such as coconut cream and vegan butter to make the dish fully vegan.
Why is my paneer butter masala too acidic or tangy?
An overly acidic paneer butter masala usually means the tomatoes were not cooked long enough. Tomatoes need to be cooked until the raw, sharp acidity mellows into a sweet, deep flavor. Cook the tomatoes for at least 15 to 20 minutes until the oil separates from the mixture. You can also add a small pinch of sugar or a splash of cream to balance any remaining acidity. Using underripe or sour tomatoes will also contribute to excessive tanginess, so always choose the ripest tomatoes available.
How do I make paneer butter masala ahead of time?
Paneer butter masala can be made ahead of time and stored in the refrigerator for up to 3 days. However, it is best to add the paneer cubes just before reheating rather than storing them in the gravy, as they can become rubbery during refrigeration. Make the gravy as usual, cool it completely, and store it in an airtight container. When ready to serve, reheat the gravy gently, add fresh paneer cubes, and simmer for 5 minutes. The flavors actually improve overnight as the spices continue to develop.
What makes restaurant paneer butter masala different from homemade?
Restaurants typically use more butter, cream, and cashew paste than most home cooks, which creates a richer, more indulgent gravy. They also often use a blender to puree the gravy to an ultra-smooth consistency. Some restaurants add food coloring for a more vibrant red color, which you can skip at home. Additionally, restaurants often use a technique called “tempering” where they add a final splash of hot butter infused with spices right before serving, which adds an extra layer of flavor and aroma.


Reader Comments
Leave a Comment
No comments yet. Be the first to share your thoughts!